In ASP.NET Core, IFormFile is the best choice for uploading small files like 200KB avatar or invoice PDF. But when you build enterprise applications that handle massive files like 5 GB documents, drawing or CAD models. You need a more robust approach.
In this article, we will build a production-ready, resumable, zero-memory chunked file upload system using ASP.NET Core Web API and Clean Architecture.
Architecture Flow
The upload process is divided into distinct, manageable steps. Instead of sending raw file paths over the network.

The 5-Step Lifecycle Overview
Here is how the four physical storage operations work across the system:
- Step 1: Initialize Slot (InitUploadAsync)
The client sends file metadata (name, size). The server reserves empty space on disk in /temp, stores the record in the database with status Temporary (and a 30-day expiration TTL), and finally returns the AttachmentId to the client. - Step 2: Stream Chunks (UploadMultiPartAsync)
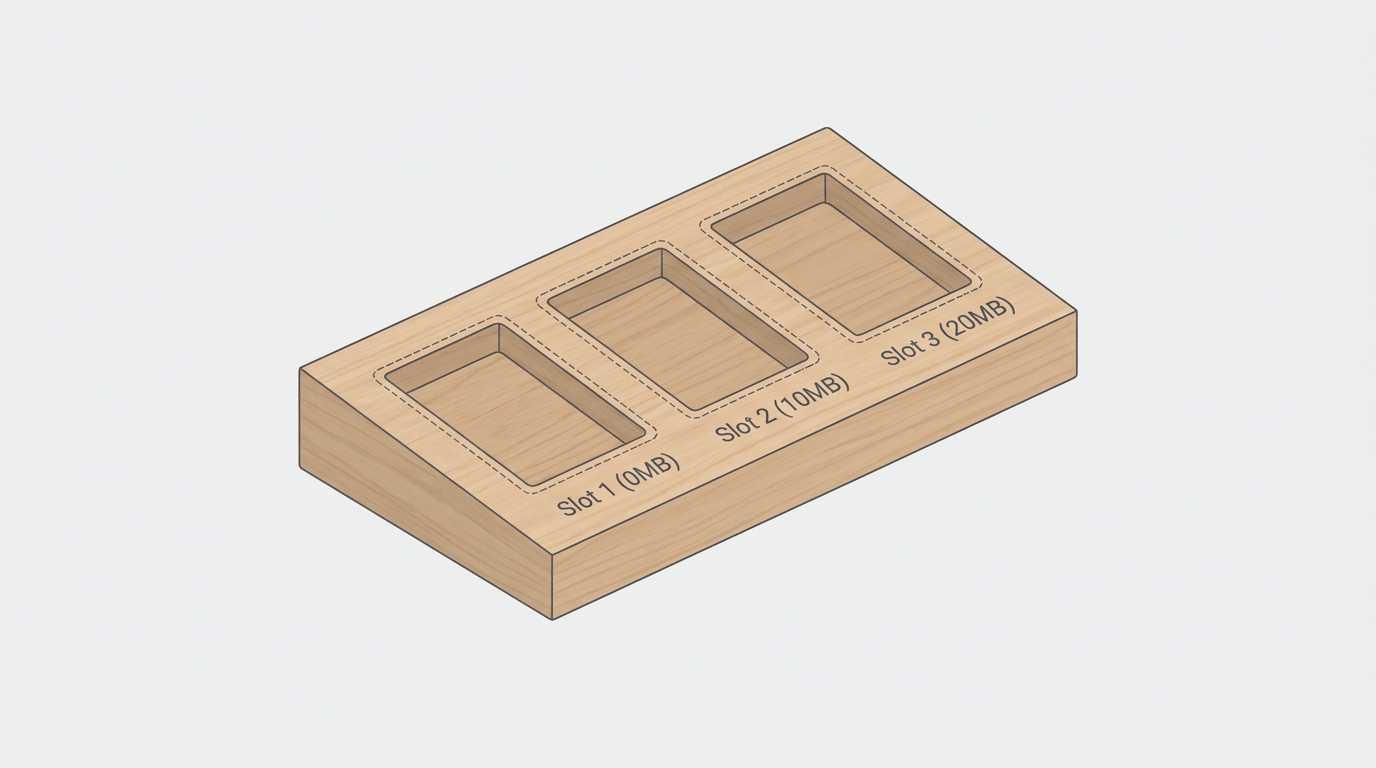
The client uploads 10 MB slices. The server calculates the exact byte offset The client sends each 10 MB chunk along with the AttachmentId. The server finds the real file path in the database, jumps to the exact position for that chunk (e.g., Part 1 at 0 MB, Part 2 at 10 MB), and writes the data straight to disk without using up server memory. - Step 3: Validate & Promote (SaveTemporaryFileAsync)
When the user finishes and clicks “Submit”, the server checks that the file is valid, moves it from the /temp folder to the permanent /saved folder, and marks it as Saved in the database. - Step 4: Background Cleanup (ClearStaticFile)
If a user abandons an upload, a scheduled Hangfire job runs daily to delete physical files from /temp and remove database records that match two conditions: Status == Temporary and CurrentTime >= ExpiredAt.
public interface IStorageService
{
    Task InitUploadAsync(string filePath, long totalSize, CancellationToken ct = default);

    Task UploadMultiPartAsync(string filePath, int partNumber, Stream content, CancellationToken ct = default);

    Task<string> SaveTemporaryFileAsync(string tempPath, string destPath, CancellationToken ct = default);

    Task ClearStaticFile(string filePath, CancellationToken ct = default);
}
Step 1: Storage States
We use two states to keep our database clean: files are only temporary until the user officially saves them
public enum FileStorageStatus
{
    Temporary = 1,
    Saved = 2
}- Temporary (Draft): The file is stored in /temp. If the upload is cancelled halfway, it won’t affect any real data and can be deleted automatically.
- Saved (Official): Once the user clicks Submit, the file moves to /saved and links to the document permanently.
Step 2: Initialize Upload Slot
The client makes one simple request with the file metadata, and the server prepares the storage slot.

What happens in this step:
- Client sends metadata FileName, FileSize and ContentType.
- The server calls FileStream.SetLength(totalSize) in /temp to reserve empty space upfront (like carving out empty slots on a shelf).
- The server stores a record in the database with status Temporary and a 30-day expiration TTL
- The server returns the generated AttachmentId to the client.
Real-World Example with a 30 MB Engineering Drawing (Click on)
Suppose an engineer uploads an architectural file named structural_layout_level_3.pdf with a size of 30 MB (31,457,280 bytes):
Client sends request:
POST /api/drawings/attachments/initialize
{
  "fileName": "structural_layout_level_3.pdf",
  "fileSize": 31457280,
  "contentType": "application/pdf"
}
What happens on the Server:
- On Disk (/temp): Creates an empty file named 3fa85f64_structural_layout_level_3.pdf and executes fs.SetLength(30MB). The disk now has a 30 MB empty container ready to receive chunks.
// POST /api/drawings/attachments/initialize
var attachmentId = Guid.NewGuid();
var physicalPath = Path.Combine(storagePath, "temp", $"{attachmentId}_{request.FileName}");

// 1. Create 30 MB empty placeholder file on disk
await storageService.InitUploadAsync(physicalPath, request.FileSize);

// 2. Save metadata in DB with status "Temporary"
dbContext.DrawingAttachments.Add(new DrawingAttachment
{
    Id = attachmentId,
    FileName = request.FileName,
    FileSize = request.FileSize,
    ContentType = request.ContentType,
    FilePath = physicalPath,
    Status = FileStorageStatus.Temporary,
    ExpiredAt = DateTime.UtcNow.AddDays(30)
});
await dbContext.SaveChangesAsync();

// 3. Return the AttachmentId
return Results.Ok(new { AttachmentId = attachmentId });- In Database: A new row is saved in the DrawingAttachments table
Id: 3fa85f64-5717-4562-b3fc-2c963f66afa6
FileName: "structural_layout_level_3.pdf"
FileSize: 31457280 (30 MB)
ContentType: "application/pdf"
Status: Temporary
ExpiredAt: Today + 30 Days
Server returns response:
HTTP/1.1 200 OK
{
  "attachmentId": "3fa85f64-5717-4562-b3fc-2c963f66afa6"
}
Step 3: Stream Chunk Slices (The Client-Server Handshake)
Once the client receives the AttachmentId, it chops the 30 MB file into three 10 MB chunks and streams them to the server slice by slice

How Client and Server Communicate Smoothly:
Client uses native file.slice() to cuts a 30 MB file into three 10 MB slices and sends them one by one.
Uploading Chunk 1:
- Client calls: POST /api/drawings/attachments/3fa85f64…/upload?partNumber=1 with the first 10 MB stream.
- Server: Finds the physical file in the database, seeks to offset 0 MB, writes the slice directly to disk, and returns 200 OK.
Uploading Chunk 2:
- Client calls: POST /api/drawings/attachments/3fa85f64…/upload?partNumber=2 with the second 10 MB stream.
- Server: Seeks to offset 10 MB, writes the slice directly to disk, and returns 200 OK.
Uploading Chunk 3:
- Client calls: POST /api/drawings/attachments/3fa85f64…/upload?partNumber=3 with the final 10 MB stream.
- Server: Seeks to offset 10 MB, writes the slice directly to disk, and returns 200 OK.
The Byte Offset Formula (Click on)
| Chunk Number | Calculation | Byte Offset on Disk | Client Progress |
|---|---|---|---|
| Part 1 | (1−1)×10 MB | 0 MB (Start of file) | 33% |
| Part 2 | (2−1)×10 MB | 10 MB | 66% |
| Part 3 | (2−1)×10 MB | 20 MB | 100% |
Code sample (C#) (Click on)
// POST /api/drawings/attachments/{attachmentId:guid}/upload?partNumber=1
var attachment = await dbContext.DrawingAttachments.FindAsync(attachmentId);
if (attachment == null || attachment.Status != FileStorageStatus.Temporary)
    return Results.NotFound("Temporary attachment not found.");

// 1. Calculate offset for this chunk
long offset = (long)(partNumber - 1) * chunkSize;

// 2. Open file, jump directly to offset, and stream data
await using var fileStream = new FileStream(attachment.FilePath, FileMode.Open, FileAccess.Write, FileShare.ReadWrite);
fileStream.Position = offset;

await chunkContentStream.CopyToAsync(fileStream);

return Results.Ok(new { Message = $"Part {partNumber} uploaded successfully." });
Code React.js Helper Sample (Click on)
const CHUNK_SIZE = 10 * 1024 * 1024; // 10 MB per chunk

export async function uploadFileInChunks(file, onProgress) {
  // Step 1: Initialize upload and get AttachmentId
  const initRes = await fetch('/api/drawings/attachments/initialize', {
    method: 'POST',
    headers: { 'Content-Type': 'application/json' },
    body: JSON.stringify({
      fileName: file.name,
      fileSize: file.size,
      contentType: file.type || 'application/octet-stream',
    }),
  });
  const { attachmentId } = await initRes.json();

  // Step 2: Slice file and upload chunk by chunk
  const totalChunks = Math.ceil(file.size / CHUNK_SIZE);

  for (let partNumber = 1; partNumber <= totalChunks; partNumber++) {
    const start = (partNumber - 1) * CHUNK_SIZE;
    const end = Math.min(start + CHUNK_SIZE, file.size);

    // Native browser slicing (0 memory cost!)
    const chunkBlob = file.slice(start, end);

    await fetch(`/api/drawings/attachments/${attachmentId}/upload?partNumber=${partNumber}`, {
      method: 'POST',
      headers: { 'Content-Type': 'application/octet-stream' },
      body: chunkBlob, // Send raw slice directly in request body
    });

    // Update UI progress bar (e.g. 33%, 66%, 100%)
    if (onProgress) {
      onProgress(Math.round((partNumber / totalChunks) * 100));
    }
  }

  // Step 3: Return attachmentId ready for form submission
  return attachmentId;
}
Step 4: Validate and Promote File
When the user clicks the “Submit” button on their form:
- The server checks that the attachment exists and is valid.
- Moves the completed file from the /temp folder to the /saved folder.
- Updates the database status from Temporary to
Savedand links it to the new document.
Code sample (C#) (Click on)
// POST /api/drawings (Submit Document)
var attachment = await dbContext.DrawingAttachments.FindAsync(request.AttachmentId);
var savedPath = Path.Combine(storagePath, "saved", Path.GetFileName(attachment.FilePath));

// Move file from temp/ to saved/
File.Move(attachment.FilePath, savedPath, overwrite: true);

// Update database status
attachment.Status = FileStorageStatus.Saved;
attachment.FilePath = savedPath;
attachment.DrawingVersionId = newDrawing.Id;

await dbContext.SaveChangesAsync();
return Results.Created($"/api/drawings/{newDrawing.Id}", newDrawing);
Step 5: Automated Cleanup with Hangfire
To prevent abandoned uploads from consuming disk space, a daily Hangfire recurring job purges uncompleted files.
Cleanup Conditions:
- Status == Temporary (The upload was abandoned; the user never clicked “Submit”).
- CurrentTime >= ExpiredAt (The current time has reached or passed the expiration date).
Conclusion
Traditional uploads work well for small files, but large files need chunking to stay reliable. Slicing files into 10 MB pieces prevents server crashes, bypasses upload limits, and lets users resume uploads easily. Combined with automatic background cleanup, this pattern keeps your storage fast, clean, and scalable for any enterprise project.
